About a year and half ago, I took a kimchi making class where I learned to make kinds with Hae Jung Cho, a master preserver and chef. Read about the experience here. I was recently inspired by the Netflix series Cooked, inspired by a book of the same name, written by Michael Pollan. He delves into the health benefits of fermentation and how it’s a technique used to preserve food and also explains all the nutritional value of it. I love that he makes his own kimchi too! It reminded me of this easy recipe. Took me about an hour on a Monday night. Enjoy!

day 10 of the kkakdugi – perfectly ripe!
diced radish kimchi (kkakdugi) adapted from Hae Jung Cho’s recipe
(makes about 2/3 a kimchi jar, the squat half-size one)
Ingredients
3 lbs. radish (I like the Korean grown ones)
1 TB sea salt (or kosher salt)
1 tsp sugar (white is fine)
1/2 cup of ground red pepper
2 TB Asian fish sauce
1 1/2 TB minced garlic
2 TB minced ginger
3 green onion stalks
1/2 bunch of Korean watercress or minari
1 tsp salt (added later)
Preparation
1. Wash the radish. Use a veggie peeler to peel the skin. Chop into 1-inch cubes.
2. In a glass, ceramic, or stainless steel bowl, place the radish cubes and sprinkle with 1 TB of salt and 1 tsp of sugar. Let this sit for about 40 minutes then drain radish in a strainer or colander for 10 minutes.
Directions
1. While the radish is sitting in the salt and sugar mixture, wash and trim the green onions and watercress. Chop them into 1-inch pieces and set aside.
2. In a large glass, ceramic, or stainless steel bowl (plastic may stain), mix together the fish sauce, ground red pepper, garlic, and ginger.
3. Add the cubed radish to the bowl and incorporate until all sides of the radish are coated (I suggest using one-time use plastic gloves).
4. Add in the watercress and green onions and gently mix.
5. Taste to determine whether to add more salt into the mixture.
6. Put mixture into a container, like a glass kimchi or mason jar, pressing down to reduce air bubbles.
7. Pour a small amount of water in the mixing bowl to collect all the remaining seasoning and pour into the container. Press down again.
8. Cover container and let it sit in a cool, dark place at room temperature for 2-3 days. Then, refrigerate and enjoy in about 8-10 days as it takes about 10 days to 2 weeks for full fermentation.
Notes
I substituted fish sauce for salted shrimp due to a shellfish allergy. To use salted shrimp, add 2 1/2 TB instead of 2 TB of fish sauce. I like making my own kkakdugi as it is less sweet and less salty than the store bought kind. Very refreshing.

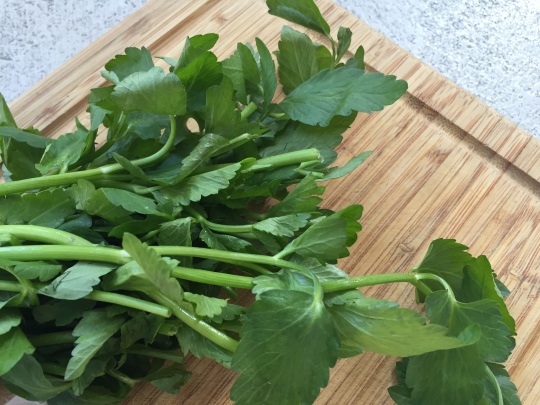
Korean watercress (minari)
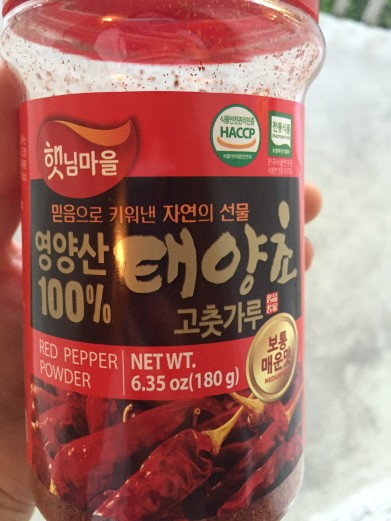
Red pepper powder – look for ‘Product of Korea’
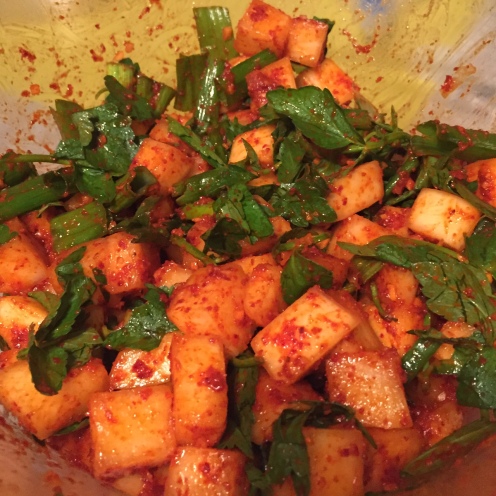
Day 1 of the kkakdugi

Day 2 old kimchi jars come in handy